Tags
My poor granddaughter has been so patient with the extremely slow progress on the dollhouse. She recently asked me when she could play with it, and I told her I’d make her a dollhouse she can play with right now. She thought a moment and asked, “Would it be as big as me?” “Almost,” I told her.
I had already found this idea online for a treehouse dollhouse; I just needed to figure out an easier way to make the tree trunk. And then I found this great tutorial for making tree bark out of tin foil, masking tape and paper towels. The tutorial came from this website, which uses a slightly more traditional version of papier maché. So Mimi’s Cave in Spare Oom once again became a construction zone, this time of the woodland sort.
 I started with papier maché boxes from Hobby Lobby which I spray painted a warm white inside.
 A string of tiny, battery-operated LED lights made a quick, easy way to light the treehouse. I used an ice pick and then a letter opener to poke holes in the back of the treehouse to thread the light string through. Then I cut out a round window for each room.
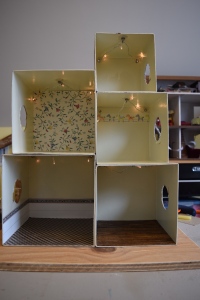 Next I glued the rooms together using a tube of quick dry glue to avoid white glue which would have dampened the papier maché and to provide a stronger, more flexible bond than hot glue. A plywood base provided a stable surface to glue the entire treehouse onto. Once the rooms were glued together, I decorated them–although it would have been easier to reverse the steps. The kitchen floor was made of scrapbooking paper sprayed with a satin acrylic spray, while the living room floor was made of thin craft sticks glued onto a scrapbook paper template and pressed under heavy books until dry.
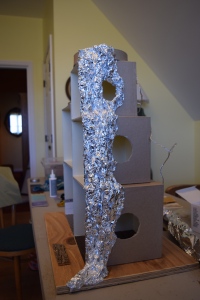 One 300 foot roll of cheap aluminum foil was more than sufficient for the entire project. I crumpled bits to fill in all of the square crevices and to round off all the corners of the boxes to create a more rounded tree. I tore off a sheet of aluminum foil longer than the treehouse was tall, then crumpled it into a long piece, which was then hot-glued to the boxes.
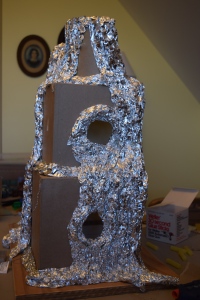 Shorter lengths of foil were easy to glue around the windows and to fill in any gaps between vertical “runs” of bark.
 Once the foil bark was glued on, it was time to cover it with masking tape. One large, cheap roll was more than enough. The masking tape needed to cover the foil so that the papier maché would adhere to it.
 Next, a coat of brown acrylic paint went onto the tree and the base board. One large bottle of paint was more than enough. Bits of white peeked through the brown, but the next step would take care of that.
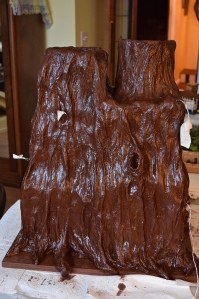 I then brushed dark Minwax stain onto the entire tree. It ran down into the crevices and helped fill in any tiny white gaps that the brown paint didn’t cover. I used paper towels to soak up any excess that pooled at the bottom. After each side was glazed, I gently dabbed over it with an absorbent rag to remove some of the glaze on the protruding areas, leaving more contrast with the crevices.
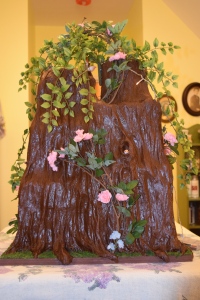 When everything was dry, I sprayed two coats of matte acrylic sealer over the tree to tone down any shininess left from the Minwax glaze. I used Aleene’s extra tacky glue to apply sheet moss around the base of the tree to serve as grass, adding small flat stepping stones. Then I cut apart a grapevine wreath and hot-glued pieces of it to the tree to serve as vines. I cut apart a bouquet of small pink silk roses and wove them into the grapevine.
 The final touches were bouquets made of small blue silk flowers and tiny mushroom birds glued here and there. A tiny wooden mouse nestled in a hole at the base of the tree.
 The treehouse was finished and ready for its fairy occupants and their furniture. The house was almost completely furnished with extra dollhouse things I’ve collected over the years.
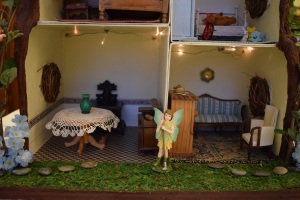 A dainty fairy stands outside the kitchen and living room. You can see the mini grapevine wreaths that serve as interior window frames.
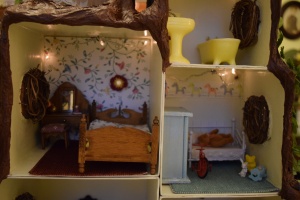 Two bedrooms grace the second level, one for the grown-up fairy and one for the little one and her fuzzy bear friend who is taking a nap.
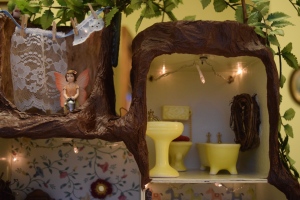 On the top level is a bathroom, which has a rooftop garden on top of it, and an open air laundry room, complete with tiny clothespins to hold the lace curtain the smallest fairy is hanging up to dry.
 The fairies seemed very happy, but my creation still had to pass the acid test. What would the grandkids think? They were here this weekend, and I can safely say that the treehouse passed with flying colors! I was thrilled that the promise I made to my granddaughter was fulfilled with such success in her eyes.

Wow! I absolutely love this! I want one, too! I bet your grandchildren had a blast playing with it. I think I will make one for my nieces to play. You did a fabulous job! Thanks for sharing your progress.
Thanks, Janell! You can totally make one, and much better than mine, I’m sure! I’d love to see photos of it if you make one.
How adorably sweet! Well done!
Thank you so much, Cider12! Coming from you, that is a treasured compliment. 🙂 And I’m so glad to see you back! I just popped over to your blog to comment, and I have to see why my notifications didn’t tell me you were back.